
Secure Your Child’s Future Today: A Complete Guide to NPS Vatsalya Registration

Imagine being able to give your child a massive financial head start in life, long before they even write their first resume or earn their first paycheck. We all want to secure our kids' futures, but between school fees and daily expenses, building a real, long-term safety net can feel overwhelming.
How exactly does NPS Vatsalya help?
NPS Vatsalya acts as a financial time machine, using a government-backed structure to turn small contributions into significant wealth through decades of compounding. By starting early, even a ₹1,000 monthly investment can grow into a fortune. Securely locked until the child turns 18, the account then transitions to them, providing a lifelong financial safety net from their first job through retirement.
Guide to Building a Lifetime of Security in 10 Easy Steps
PensionBox lets you track your child’s financial future and your own retirement goals side-by-side in one powerful, unified dashboard. No branch visits, no paperwork - just pure, stress-free control as you watch you & your kids’ wealth grow together. And the best part? You get all of this at absolutely no additional charge.
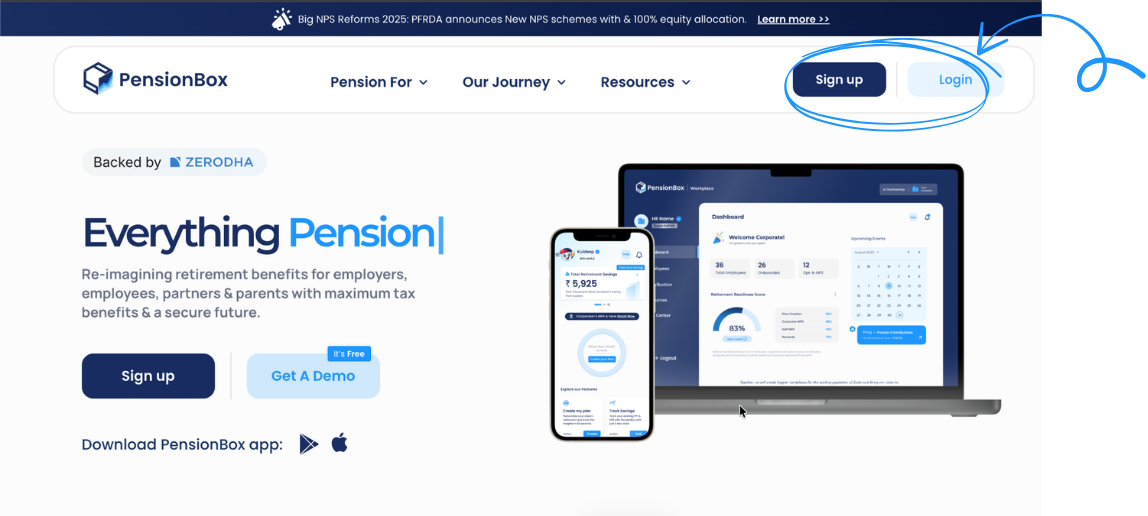
Step 1: Login to PensionBox with your phone number
Navigate to the official PensionBox website, select the Sign Up/Login option, and enter your mobile number to access your dashboard instantly via a secure OTP.
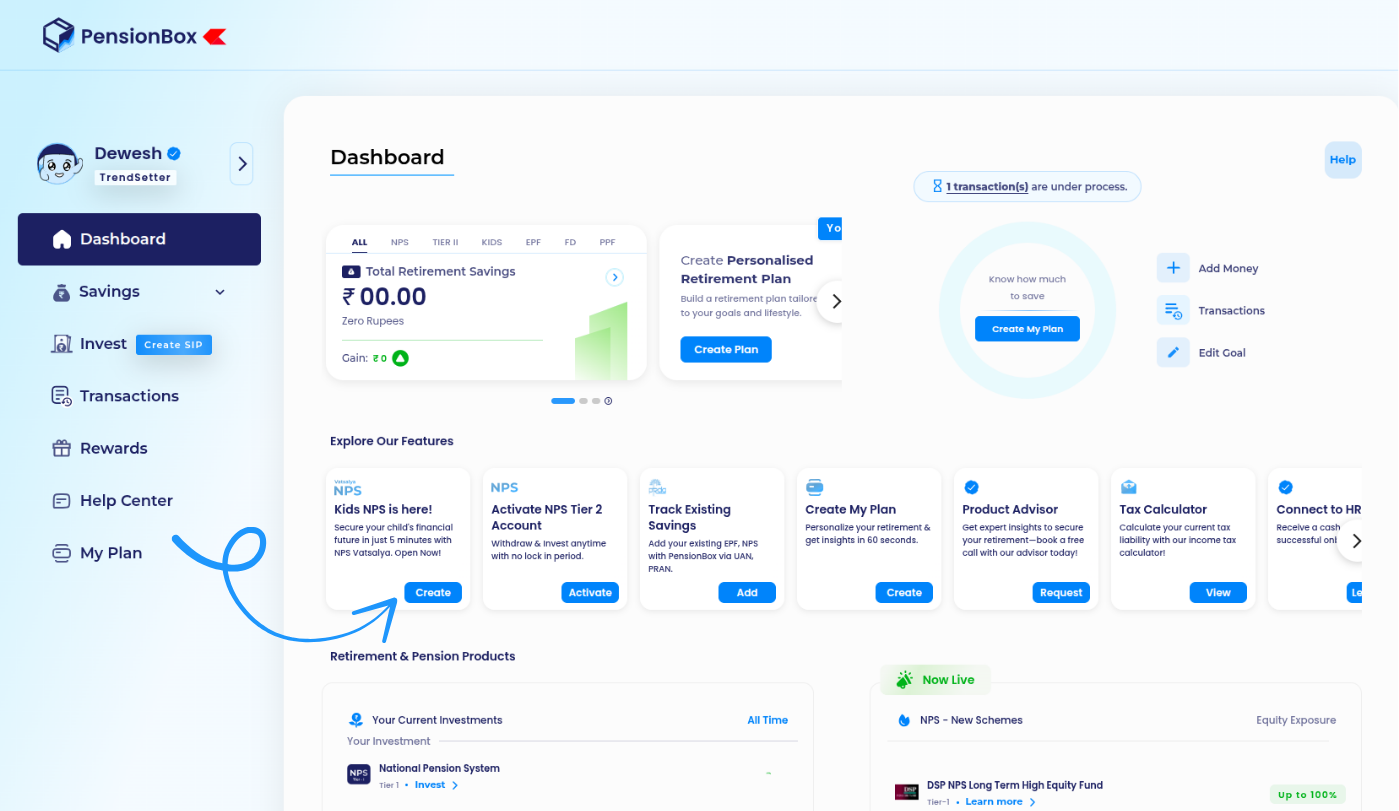
Step 2: Select 'NPS for Kids' from your dashboard
Once logged in, navigate to the main dashboard and click "Create" NPS for Kids to start the setup process.
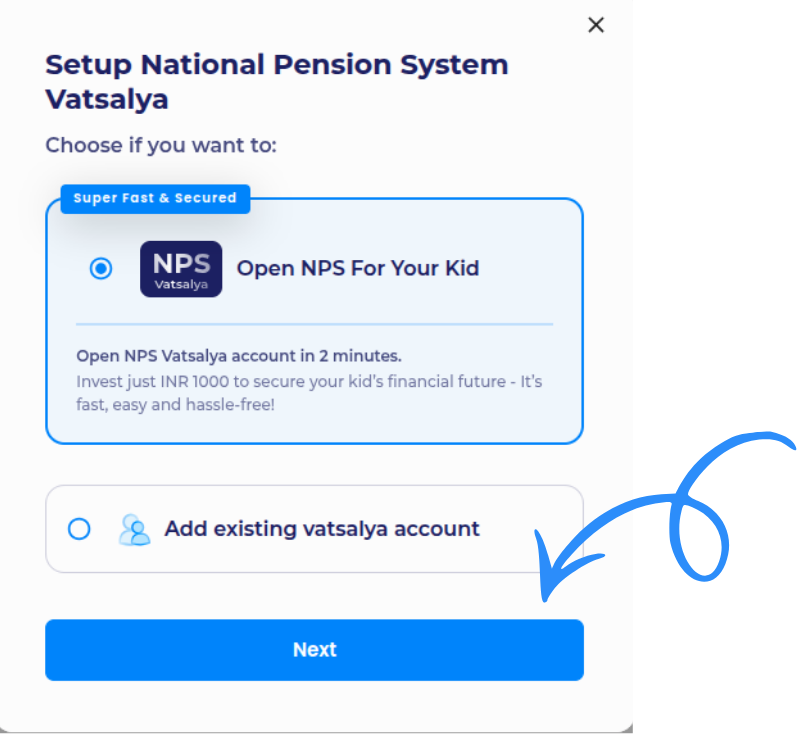
Step 3: Initiate the NPS Vatsalya registration
Select**"Open NPS for your Kid"** to establish a new account from scratch. Click "Add Existing Vatsalya Account" if you already have one set up elsewhere. Click “Next” to proceed.
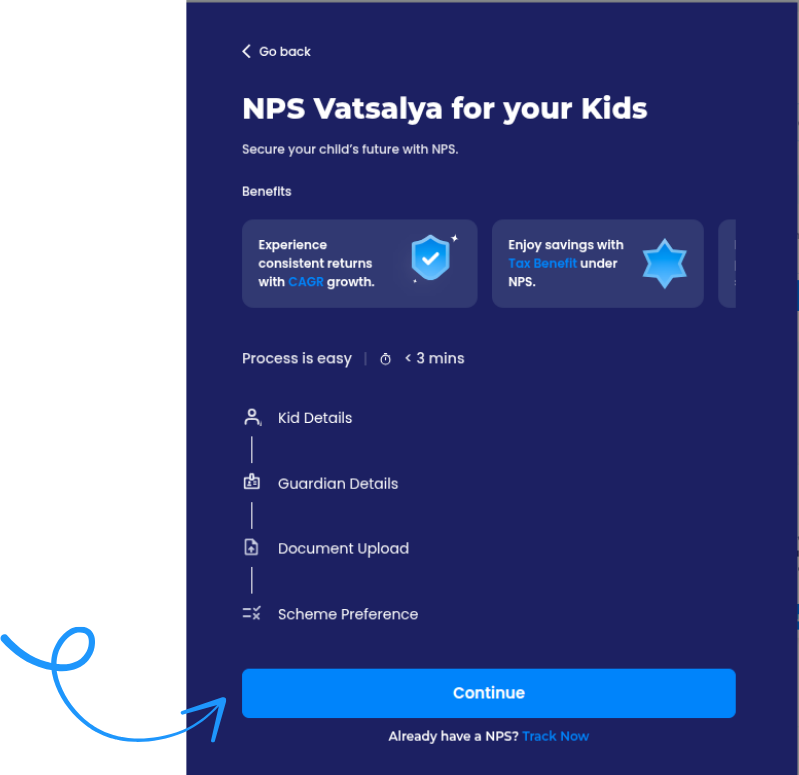
Step 4: Review the process and continue
A quick overview pop-up will appear showing the setup steps; click the "Continue" button to move forward.
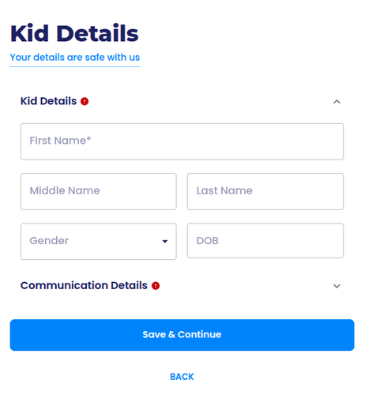
Step 5: Fill in your kids details
Enter basic details of your kid such as their name, date of birth, gender, and address details. Click "Save and Continue" once entered.
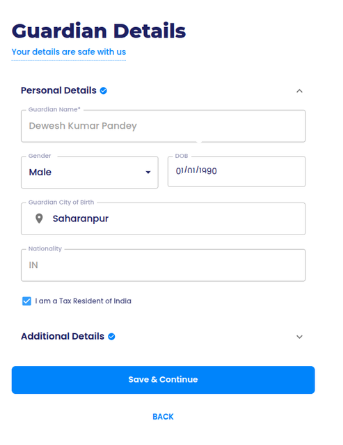
Step 6: Enter the Guardian's Details
Fill in your basic information as the parent or guardian to safely link your identity to the child's account. Click "Save and Continue" once entered.
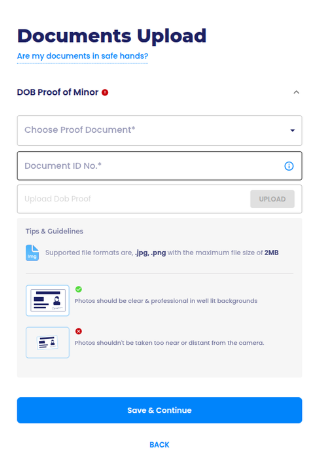
Step 7: Upload documents for digital verification
Upload the required document (birth certificate) to complete a quick, secure online verification process. Click "Save and Continue" once the relevant document is uploaded and details are entered.
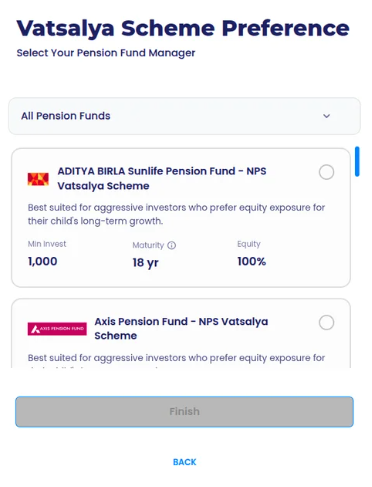
Step 8: Select your preferred pension fund manager
Choose your preferred registered entity (the pension fund manager) to manage your investments and click "Finish".
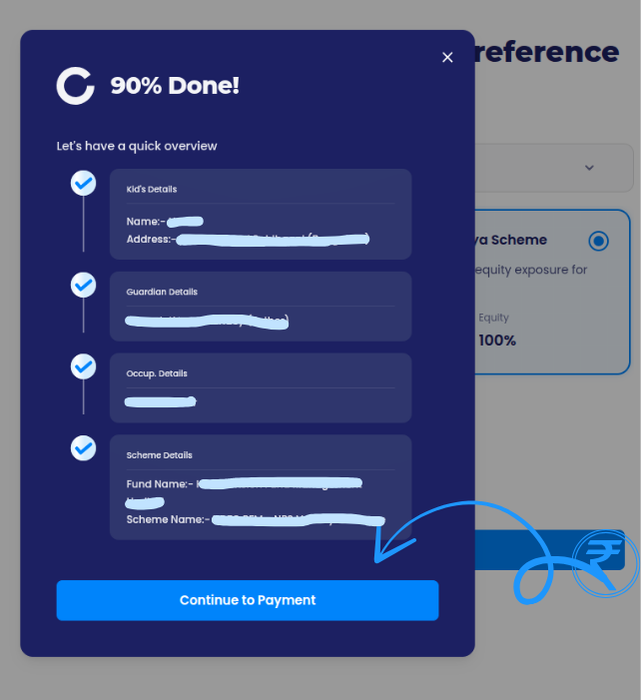
Step 9: Review and continue to payment
Verify the quick overview summary of entered details and selected scheme and click "Continue to payment".
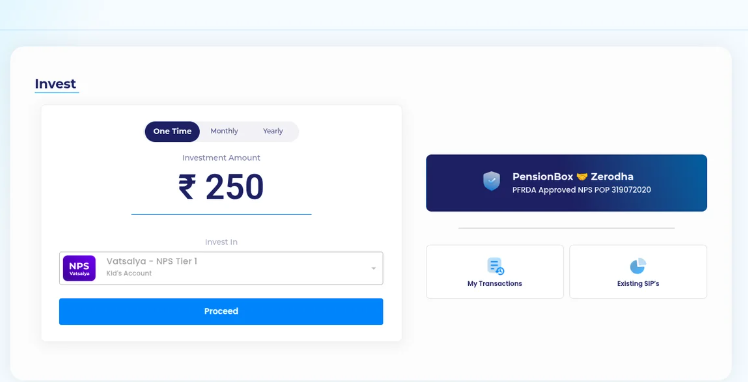
Step 10: Set Your Contribution and Make your initial payment
Enter your initial contribution amount, and click "Proceed" to finalize the setup and officially launch your child's financial journey.
Ready to Take the First Step?
Financial security isn't built overnight, but it does start with a single decision. By streamlining the entire NPS Vatsalya registration into 10 effortless, digital steps, PensionBox removes the guesswork so you can focus on what truly matters - watching your children's future thrive. The best time to start investing for your child was yesterday; the next best time is right now. Head over to PensionBox to set up your unified dashboard and set their financial journey in motion today.
2,00,000+ Stories
Hope they inspires you as well.

their NPS stories for a golden retirement.







PensionBox simplifies the National Pension System(NPS), the government's pension scheme for private employees both for retail users and HRs/companies.
If you don’t have an NPS account, you can simply open your pension account within 2 minutes and if you have NPS PRAN already, you will be able track, invest and manage everything free of charge with best user experience.
We never touch or hold your money directly, your investments go safely to your chosen pension fund through approved channels.
We are built with Zerodha as POP , ensuring transparency, data security, and peace of mind. Your retirement savings are protected by regulation and secured by technology.
That’s why, PensionBox brings transparency, zero charges, timely support and freedom to select any pension fund so that you get the best experience investing in NPS & be better future ready.
That’s not it, we help you & your company together to maximise contribution and tax savings with minimal charges & best user experience.
If you are an existing zerodha user then you get a fast login or sign up using kite ID.
Once you are onboarded with kite ID, you get free access to
- Open NPS in 2 minutes
- Track existing NPS
- POP shift or CRA shifting
- Invest in one time or create SIP in NPS
- Withdraw NPS requests & instant withdraw tier 2
- Create your dream retirement plan
- Open NPS Vatsalya for your kid
- Share with HR (To unlock more tax benefits)
- Employer Contribution:
- Contributions made by your employer to your NPS account are tax-free up to 14% of your basic salary under Section 80CCD(2). Do connect us with your HR to enable this for you.
Tax Benefits in Old Tax Regime - Self-Contribution:
- Deduction up to ₹1.5 lakh under Section 80C.
- Additional deduction of ₹50,000 under Section 80CCD(1B) — exclusive to NPS investments!
- This allows you to claim a total deduction of up to ₹2 lakh every year on your NPS contributions.
- Employer Contribution:
- Contributions made by your employer to your NPS account are tax-free up to 10% of your basic salary (Basic + DA) under Section 80CCD(2). Do connect us with your HR to enable this for you.
- This is over and above your personal deduction limits, giving you extra tax efficiency.
Feel free to book a free call to learn more about NPS, NPS Vatsalya, Corporate NPS & PensionBox or contact the support team.